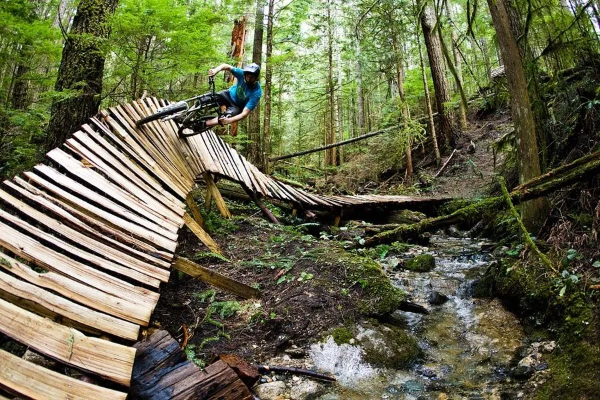
Mountain biking is an exhilarating sport that combines the thrill of cycling with the challenge of rugged terrain. One of the most critical factors affecting your performance and safety on the trails is tire pressure. In this comprehensive guide, we will explore everything you need to know about the best tire pressure for mountain biking.
Why Tire Pressure Matters
Tire pressure is crucial because it directly impacts your bike’s performance, handling, and comfort. Proper tire pressure ensures better traction, improved control, and a smoother ride. It also helps prevent flats and reduces wear on your tires.
Factors Affecting Tire Pressure
Several factors influence the ideal tire pressure for mountain biking. Understanding these factors will help you make informed decisions:
Rider Weight
- Heavier riders need higher tire pressure.
- Lighter riders can use lower tire pressure.
Tire Width
- Wider tires require less pressure.
- Narrower tires need more pressure.
Terrain Type
- Rough, rocky trails benefit from lower pressure for better grip.
- Smooth, hard-packed trails work well with higher pressure.
Weather Conditions
- Wet conditions may require lower pressure for more traction.
- Dry conditions allow for higher pressure.
Riding Style
- Aggressive riders might prefer lower pressure for better handling.
- Casual riders might opt for higher pressure for less rolling resistance.
How to Measure Tire Pressure
To achieve the perfect tire pressure, you need a reliable gauge. Here are the steps to measure tire pressure accurately:
Choose the Right Gauge
- Use a digital or analog gauge.
- Ensure it’s compatible with your bike’s valve type (Presta or Schrader).
Check the Recommended Pressure
- Look at the sidewall of your tire for recommended pressure.
- Consider your weight, terrain, and riding style.
Inflate to Desired Pressure
- Use a pump to inflate your tires.
- Check pressure frequently while inflating.
Fine-Tune Your Pressure
- Adjust based on initial ride feel.
- Experiment with slight increases or decreases.
Recommended Tire Pressure Ranges
While the ideal tire pressure can vary, here are some general guidelines:
Cross-Country Riding
- Front: 20-25 PSI
- Rear: 22-28 PSI
Trail Riding
- Front: 18-23 PSI
- Rear: 20-25 PSI
Enduro and Downhill
- Front: 15-20 PSI
- Rear: 18-23 PSI
Tips for Adjusting Tire Pressure
Start with Manufacturer Recommendations
- Begin with the pressure range suggested by your tire manufacturer.
Adjust for Weight
- Add 1 PSI for every 10 pounds over 160 pounds.
- Subtract 1 PSI for every 10 pounds under 160 pounds.
Adjust for Terrain
- Lower pressure by 2-3 PSI for rocky, technical trails.
- Increase pressure by 2-3 PSI for smooth, fast trails.
Monitor Performance
- Pay attention to how your bike handles.
- Adjust as necessary to improve grip and comfort.
Impact of Tire Pressure on Performance
Tire pressure can significantly affect your biking experience. Here’s how:
Traction
- Lower pressure increases the contact patch for better grip.
- Higher pressure reduces the contact patch but can roll faster.
Control
- Proper pressure ensures your tires conform to the terrain.
- Over-inflated tires can bounce and reduce control.
Comfort
- Lower pressure provides a smoother ride.
- Higher pressure can make the ride harsher.
Puncture Resistance
- Higher pressure reduces the risk of pinch flats.
- Lower pressure can increase the risk but offers better traction.
Common Tire Pressure Mistakes
Avoid these common mistakes to ensure optimal tire performance:
Over-Inflation
- Causes reduced traction and increased risk of bouncing.
- Leads to a harsher ride and increased tire wear.
Under-Inflation
- Increases rolling resistance and risk of pinch flats.
- Reduces control and can cause rim damage.
Ignoring Terrain
- Using the same pressure for all terrains can compromise performance.
- Adjust pressure according to trail conditions.
See Also: Is Mountaineering a Sport
Tools for Adjusting Tire Pressure
Invest in the right tools for accurate tire pressure adjustments:
High-Quality Pump
- Use a pump with a gauge for accurate readings.
- Floor pumps are ideal for home use.
Portable Pump
- Carry a portable pump on rides for on-the-go adjustments.
- Mini-pumps or CO2 inflators are convenient options.
Pressure Gauge
- A dedicated pressure gauge ensures precise measurements.
- Digital gauges are easy to read and accurate.
Experimenting with Tire Pressure
Finding the perfect tire pressure often requires experimentation. Here’s how to approach it:
Set a Baseline
- Start with recommended pressure based on your weight and terrain.
- Note how your bike feels during the ride.
Make Small Adjustments
- Increase or decrease pressure by 1-2 PSI.
- Test the changes over familiar trails.
Observe Changes
- Pay attention to handling, traction, and comfort.
- Adjust further based on your observations.
Keep Records
- Record your settings and results.
- Refer to your notes for future rides.
Tire Pressure and Tubeless Systems
Tubeless tires are becoming popular in mountain biking. They allow for lower pressures without the risk of pinch flats. Here’s what you need to know:
Advantages of Tubeless
- Lower pressure for better traction.
- Reduced risk of pinch flats.
Setting Up Tubeless
- Use tubeless-ready rims and tires.
- Seal the tires with tubeless sealant.
Finding the Right Pressure
- Start slightly lower than with tubed tires.
- Adjust based on ride feel and conditions.
Tire Pressure and Suspension
Tire pressure and suspension settings work together to optimize your ride. Consider these points:
Balance Pressure and Suspension
- Proper tire pressure complements your suspension setup.
- Too high pressure can negate suspension benefits.
Adjust Suspension for Lower Pressure
- Softer tire pressure might require firmer suspension settings.
- Experiment to find the right balance.
Conclusion
Finding the best tire pressure for mountain biking is a combination of science and personal preference. By understanding the factors that affect tire pressure and experimenting with different settings, you can optimize your bike’s performance and enjoy a safer, more comfortable ride. Remember to adjust your pressure based on terrain, weather, and your riding style to get the most out of your mountain biking experience.

