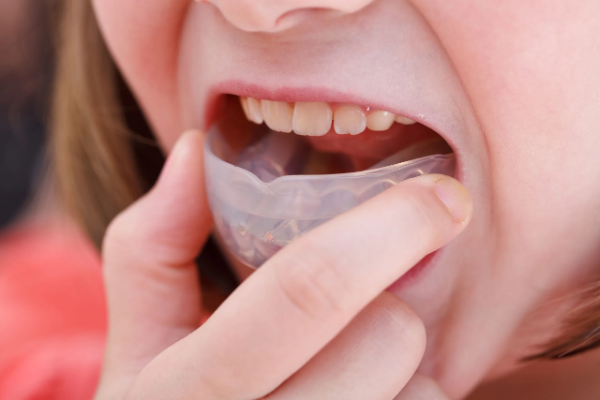
Mouthguards are crucial protective gear in sports, preventing dental injuries and reducing the risk of concussions. While ready-made mouthguards are available, they often need customization to fit individual mouth shapes. This guide will take you through the step-by-step process of fitting a mouthguard using boiling water, a simple yet effective technique.
Understanding Mouthguards
Before diving into the fitting process, it’s important to understand the types of mouthguards available:
- Stock Mouthguards: These come pre-formed and are ready to wear but offer limited customization.
- Boil-and-Bite Mouthguards: Made from thermoplastic material, these can be molded to fit the contours of your teeth after softening in boiling water.
- Custom-Fitted Mouthguards: Typically crafted by dental professionals based on molds of your teeth, offering the best fit and protection.
Benefits of Boil-and-Bite Mouthguards
Boil-and-bite mouthguards are popular among athletes for several reasons:
- Affordability: They are cost-effective compared to custom-fitted options.
- Convenience: Can be fitted at home with minimal tools.
- Effectiveness: When properly fitted, they provide good protection and comfort.
Preparing for Fitting
Before starting the fitting process, gather the necessary materials:
- Boiling water (and a container to hold it safely)
- Timer
- Mouthguard (ensure it’s appropriate for boil-and-bite fitting)
- Bowl of ice water (for cooling the mouthguard)
- Mirror
- Towel (to dry the mouthguard and protect your hands)
See Also: What Is Discover Scuba Diving
Step-by-Step Fitting Process
Now, let’s proceed with fitting your mouthguard using boiling water:
Boil Water
- Boil water in a pot or kettle until it reaches a rolling boil.
- Use enough water to submerge the mouthguard completely.
Prepare the Mouthguard
- Place the mouthguard in the boiling water for the specified time.
- Follow the manufacturer’s instructions regarding boiling time, typically around 30-60 seconds.
Remove and Cool
- Carefully remove the mouthguard using tongs or a spoon.
- Quickly dip it into the bowl of ice water for a few seconds to cool slightly.
Test Temperature
- Check the temperature of the mouthguard with your fingers to ensure it’s safe to handle.
- It should be pliable and warm but not too hot.
Fit the Mouthguard
- Insert the mouthguard into your mouth and position it correctly over your upper teeth.
- Use a mirror to align it properly with your bite.
Mold the Mouthguard
- Bite down firmly and evenly on the mouthguard.
- Press it against your teeth and gums with your fingers on the outside for about 20-30 seconds.
Cool and Final Adjustments
- Remove the mouthguard carefully and place it back into the cold water for 30-60 seconds.
- Check the fit by reinserting it into your mouth. Make adjustments if necessary by repeating steps 5 to 7.
After Fitting Care
- Rinse the mouthguard with cold water after each use.
- Store it in a clean, dry container to prevent bacteria buildup.
- Inspect the mouthguard regularly for wear and tear, replacing it as needed.
Conclusion
Fitting a mouthguard with boiling water is a straightforward process that enhances both comfort and protection during sports activities. By following these steps and taking proper care of your mouthguard, you can ensure it provides optimal fit and effectiveness. Remember, a well-fitted mouthguard is key to safeguarding your dental health while enjoying your favorite sports.
FAQ: How to Fit a Mouthguard with Boiling Water
Q: What kind of mouthguard can be fitted with boiling water?
A: Only thermoplastic mouthguards, which are made from materials that soften when heated, can be fitted using the boiling water method.
Q: Is it safe to use boiling water for fitting a mouthguard?
A: Yes, as long as you follow the instructions and take precautions not to burn yourself. Use protective gloves or a towel to handle the hot mouthguard.
Q: How do I prepare the mouthguard for fitting?
A: Clean the mouthguard with a toothbrush and soapy water before fitting. Make sure it’s dry before proceeding.
Q: How much water should I use for boiling?
A: Use enough water to fully submerge the mouthguard in the pot. It’s usually about an inch or two of water.
Q: How long should I boil the water?
A: Bring the water to a rolling boil and then turn off the heat. You don’t need to boil the water for an extended period.
Q: How do I know when the mouthguard is ready?
A: The mouthguard will become clear and soft when it’s ready. This usually takes about 30 seconds to a minute after submerging in boiling water.
Q: How do I fit the mouthguard to my teeth?
A: Place the softened mouthguard in your mouth and bite down gently. Use your fingers to press it against your teeth and mold it to your mouth shape.
Q: How long should I leave the mouthguard in my mouth?
A: Leave it in your mouth until it cools and hardens, which usually takes a few minutes. Don’t rush the process.
Q: Can I trim the mouthguard after fitting?
A: Yes, you can trim any excess material with scissors after the mouthguard has cooled and hardened. Be careful not to cut too much.
Q: How often should I replace my mouthguard?
A: Replace your mouthguard every 6-12 months or when it shows signs of wear and tear. If you play contact sports, consider replacing it after each season.

