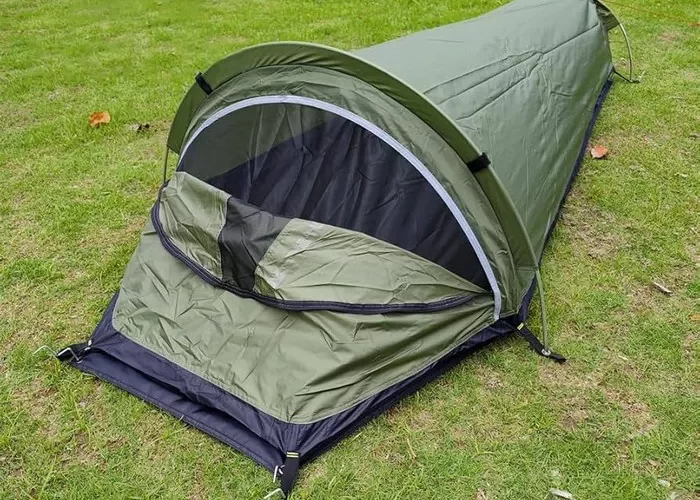
Camping is a fantastic way to connect with nature, but rainy weather can quickly dampen the experience. Having a reliable rain shelter is essential for staying dry and comfortable. This article will guide you through the best rain shelter options for camping, covering types, features, and top product recommendations.
Why You Need a Rain Shelter
A rain shelter protects you from the elements. Here are some reasons why it’s important:
- Stay Dry: Wet clothing can lead to discomfort and hypothermia.
- Extend Your Camping Time: A shelter allows you to enjoy outdoor activities even in the rain.
- Protect Gear: Keeps your camping equipment dry and functional.
- Create a Social Space: A communal area for cooking and gathering can be crucial in poor weather.
Types of Rain Shelters
1. Tents
Tents are the most common rain shelters for camping. They provide full protection from rain and wind.
- Features: Look for waterproof materials, sealed seams, and a rainfly.
- Setup: Choose a tent that’s easy to pitch, especially in bad weather.
- Ventilation: Proper airflow reduces condensation inside.
Top Tent Recommendation: REI Co-op Half Dome SL 2+ Tent
This tent is lightweight, durable, and has a great rainfly. It can withstand heavy rain and offers excellent ventilation.
2. Tarps
Tarps are versatile and can be set up in various configurations. They are lightweight and easy to pack.
- Setup Options: Use poles, trees, or stakes to create different shapes (A-frame, lean-to, etc.).
- Durability: Look for heavy-duty materials that can withstand strong winds.
- Cost-Effective: Tarps are usually less expensive than tents.
Top Tarp Recommendation: Aqua Quest Defender Tarp
This tarp is made from durable material and is waterproof. It comes in various sizes to suit your needs.
3. Canopies
Canopies offer a spacious area for cooking and socializing. They provide good rain protection but can be less portable than tents or tarps.
- Setup: Make sure it has a sturdy frame that can withstand wind.
- Ventilation: Look for designs that allow airflow while keeping rain out.
- Size: Choose a size based on your group and equipment.
Top Canopy Recommendation: Eureka! K-Size 10×10 Canopy
This canopy is easy to set up and provides excellent coverage. It’s ideal for group camping.
4. Screen Houses
Screen houses provide a bug-free zone while still offering some rain protection. They are great for warmer weather camping.
- Design: Look for a durable rainfly that covers the top.
- Ventilation: Ensure that the screen mesh is fine enough to keep insects out.
- Space: Choose a size that can accommodate your group comfortably.
Top Screen House Recommendation: Coleman Instant Screenhouse
This screen house sets up in minutes and provides excellent ventilation and rain protection.
Key Features to Consider
Waterproof Rating
The waterproof rating of your shelter is crucial. This rating is measured in millimeters (mm). A rating of 1,500 mm is considered good for light rain, while 3,000 mm or higher is ideal for heavy rain.
Material Quality
Look for shelters made from durable, waterproof materials such as nylon or polyester. The fabric should also be treated with a waterproof coating for better protection.
Weight and Packability
If you’re hiking to your campsite, consider the weight of your shelter. Lightweight materials are essential for easy transport. Tents and tarps should be easy to pack into your backpack.
Setup Ease
In rainy weather, you’ll want a shelter that’s quick and easy to set up. Look for designs that can be pitched without needing extensive assembly.
Ventilation
Proper ventilation reduces condensation inside the shelter. Look for shelters with mesh windows or vents that allow airflow.
Size
Consider how many people will use the shelter. Ensure it has enough space for everyone and their gear.
How to Set Up a Rain Shelter
Choose the Right Location
Avoid Low Spots: Water tends to collect in low areas.
Look for Trees: Trees can provide additional shelter but avoid dead branches.
Consider Wind Direction: Position your shelter away from the wind to reduce rain exposure.
Setting Up a Tent
Lay out the Tent: Spread the tent out and ensure the ground is clear of debris.
Insert Poles: Insert the poles into the designated sleeves.
Attach the Rainfly: Once the tent is pitched, attach the rainfly securely.
Stake Down: Use stakes to secure the tent, ensuring it’s taut.
Setting Up a Tarp
Select Configuration: Decide on the shape you want (A-frame, lean-to).
Attach to Trees or Poles: Use rope to tie the tarp to trees or poles.
Secure the Corners: Stake down the corners to keep the tarp taut and prevent pooling.
Setting Up a Canopy
Assemble the Frame: Follow the instructions to set up the frame.
Attach the Canopy: Once the frame is stable, place the canopy on top.
Secure with Stakes: Use stakes to secure the frame to the ground.
Maintenance and Care
Clean Your Shelter
After use, clean your shelter to prevent mold and mildew. Use a gentle soap and water solution, then allow it to dry completely before packing.
Store Properly
Store your shelter in a cool, dry place. Avoid leaving it in direct sunlight for extended periods, as UV rays can damage the material.
Check for Damage
Before each camping trip, inspect your shelter for tears or wear. Repair any damage promptly to ensure it remains waterproof.
Conclusion
Choosing the best rain shelter for camping is crucial for a successful outdoor experience. Whether you opt for a tent, tarp, canopy, or screen house, consider factors like waterproof rating, material quality, and ease of setup. With the right shelter, you can enjoy your camping adventure, rain or shine. Remember to take care of your equipment and check for damage regularly. Happy camping!

